
In this article, we will cover:
- How to activate TrueLoyal's multi-language feature
- Setting the customer's language
- Language customisation
TrueLoyal has always been focused on creating personal and meaningful experiences for its global audiences. If you create content in multiple languages for your customers, you can set up the loyalty program in multiple languages too. By activating this feature, you can present a loyalty program to your customers that matches the store's default language for enhanced localisation.
How to activate TrueLoyal's multi-language feature
- Go to General >> Settings.
- In Language Settings, select the preferred language.
- You can also change the default language of the program.
- Click Save.
Note: You won't be able to select the language for embedded forms until you have saved your selected languages.
You can set one language as the default. If TrueLoyal doesn't have the customer's language preference, the content is displayed in the default store language.
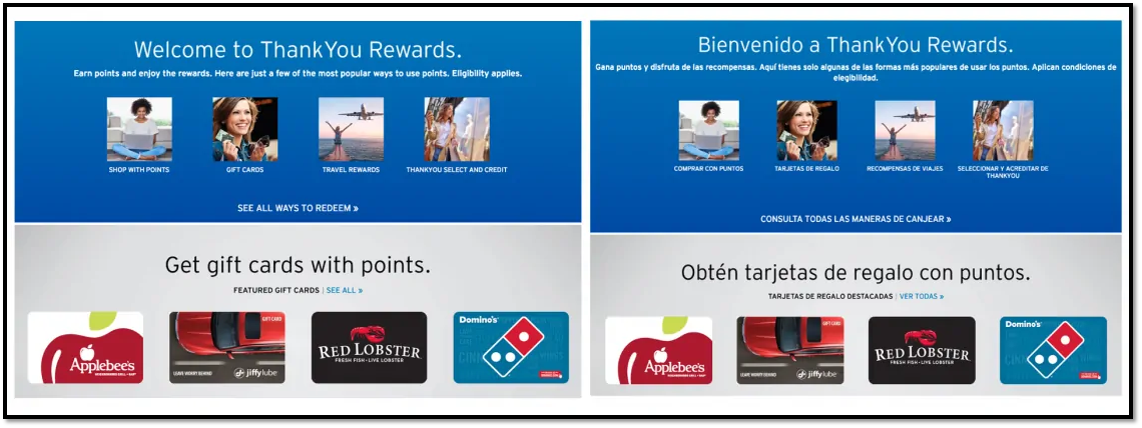
Note: The default fields will be provided exclusively in English, and it is configurable. You have the flexibility to translate the text into your preferred language for all fields.
To learn more about language customisation, refer to this section of the help document.
Please note: If an Admin has completed translations for an enabled language and subsequently disables it by unchecking it in General Settings, all translations for that specific language will be lost. If the same language is re-enabled in the future, the Admin will need to undertake the translation process again.
Setting the customer's language
The customer's preferred language can be passed to TrueLoyal through the basic integration and authentication JavaScript. See the sample script below for details.
<script type="text/javascript">

  window._zrl = window._zrl || [];

  var init_data = {
     'partner_id' : '22ee49123b',
         /*REQUIRED: Partner ID*/

     'email' : 'useremail@gmail.com',
         /*REQUIRED: When User is Logged in. For Non-Logged in users,
          pass an empty string ('')*/

     'name' : 'User Name',
         /*REQUIRED: When User is Logged in. For Non-Logged in users,
          pass an empty string ('')*/

     'user_id' : 'Unique-user-ID',
        /*REQUIRED: When User is Logged in. For Non-Logged in users
          and guest users who DO NOT have an account, pass an empty
          string ('')*/

     'ts' : 'Current TimeStamp in epoch format',
       /*REQUIRED : Timestamp in epoch format'*/

     'language' : 'french',
        /*REQUIRED: When User is Logged in. For Non-Logged in users
          and guest users who DO NOT have an account, pass an empty
          string ('')*/

     'access_token' : 'acafb9c8d189b55671b5956bd75b33ee2e982b89ef42f3b26421f6d8f7fe4872'
      /*REQUIRED : 'SHA256 hash of the string formed by concatenating
       - user_id, email, partner_id, api_key and ts - in the same
       order as mentioned' */

   };

 _zrl.push( [ 'init' , init_data ] );

</script>

<script src="//cdn.zinrelo.com/js/all.js" type="text/javascript"></script>
Note: If an empty string is passed for language, the default language will be set for the member.
To ensure the correct language mapping, specify the preferred language in the 'language' field of the JavaScript code using small caps. Please refer to the table below for language mapping:
| Preferred Language | Language Format |
|---|---|
| English | english |
| French | french |
| Italian | italian |
| German | german |
| Spanish | spanish |
| Custom Language One | custom language one |
| Custom Language Two | custom language two |
| Custom Language Three | custom language three |
| Custom Language Four | custom language four |
The language preference can also be set using the Create a Loyalty Member API.
Once you are done with the language setup, you can customise the text of the end-user loyalty program dashboard.
Language customisation
You can customise the text of the end-customer-facing elements into any preferred language. To do this, select the preferred language from the drop-down in the Text Configuration settings dashboard. This setting can be done for:
- Activities
- Rewards
- Tiers
- Point Expiration
- Notifications
Please note: Regardless of the language you choose, the default fields will be provided exclusively in English. However, you have the flexibility to translate the text into your preferred language for all fields. This allows you to customise the content according to your language preferences, ensuring a seamless and localised experience for your customers.
Note: While translating the text, do not translate the text inside the double curly brackets '#{{ }}' as they are part of the code. Refer to the screenshot below for better understanding:
Design
In Design, you can configure:
- Widget and Notifications
- User Dashboard
Widget and Notifications
You can select the preferred language from the drop-down to make the widget visible to the end user in their language.
User Dashboard
- Select the template for the user dashboard.
- Here you will see Guest View and Member View. For both, the language customisation process is the same.
- Click on Edit Dashboard Labels. From the language drop-down, select the preferred language.
- This will change the language of the labels.
General Settings
In General Settings, you can also change the language of the terms and conditions of the program or the End User Opt Feature information.
This will change all editable text (from Loyalty settings and the end-user opt-out feature to end-user block messages) into the preferred language.
Please note: We don't support HTML text in the "End User Opt-Out Message".
Campaign
- During the setup of a campaign, you also configure the notification.
- When you create or edit the notification, you can select the preferred language from the Language drop-down.
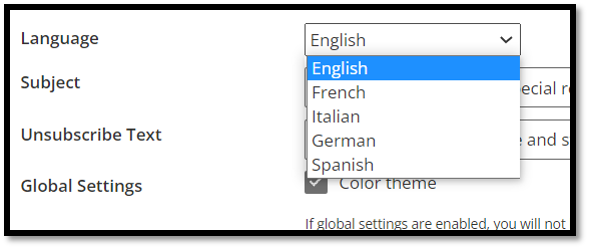
- You can preview before making final changes to the notification, and then Save.
Onsite Notifications
You can also update your End User Dashboard.
- Click on one of the Onsite Notifications options.
- When you create or edit the notification, you can select the preferred language from the Language drop-down.
- You can preview before making final changes to the notification, and then Save.
Program Introduction to Visitor
Birthday Notification
Points Balance
Product Display Pages
If you have any questions or concerns regarding setting up a multi-language reward program, please don't hesitate to contact Technical Support at support@trueloyal.com.
Comments
Please sign in to leave a comment.